What is Bubble.io?
Bubble.io is a no-code development platform that allows users to build web applications without needing to write any code. It provides a visual interface where you can drag and drop elements to design your app's UI, define workflows for functionality, and manage a database to store information. With Bubble, both developers and non-developers can create fully functional apps, ranging from simple websites to complex platforms like marketplaces, CRMs, and social networks. Its flexibility, combined with a powerful visual editor, makes it a popular choice for startups and individuals looking to launch products quickly without traditional coding skills.
Making your first API request in Bubble.io
Making your first API request in Bubble.io involves connecting your Bubble app to external services and fetching data or triggering actions from other platforms.
Bubble’s API Connector plugin allows you to easily set up API calls by configuring the request URL, method (GET, POST, etc.), and parameters, all without writing code. Once your API is configured, you can use it in your app's workflows, display dynamic data from the API, or even send data from your app to another service.
This feature is perfect for integrating third-party tools like external APIs, social media platforms, or external databases into your Bubble app seamlessly.
So first, let's sign up for a Bubble account and create a new project on Bubble.io and enter the blank project page. The next step is to ensure that we have the API Connector plugin installed. So head over to the plugins section on the left column and install Bubble's API connector plugin. You can set up headers, parameters and a call, and then any external API call can be set up to be used as an action in your app or as a data source.
Once the API connector plugin is installed, you should see a place to add APIs to it. Click on "Add another API", and specify a name to refer to this API in your app. For authentication, select "Private key in URL" and specify your SerpApi private key.
Add an API call by clicking on "Add another call". Specify a name for the API call, and specify the relevant API details from the documentation page of the API you are interested in using. You can view our documentation pages here.
For this example, let's set up an API call for our Google Search API:
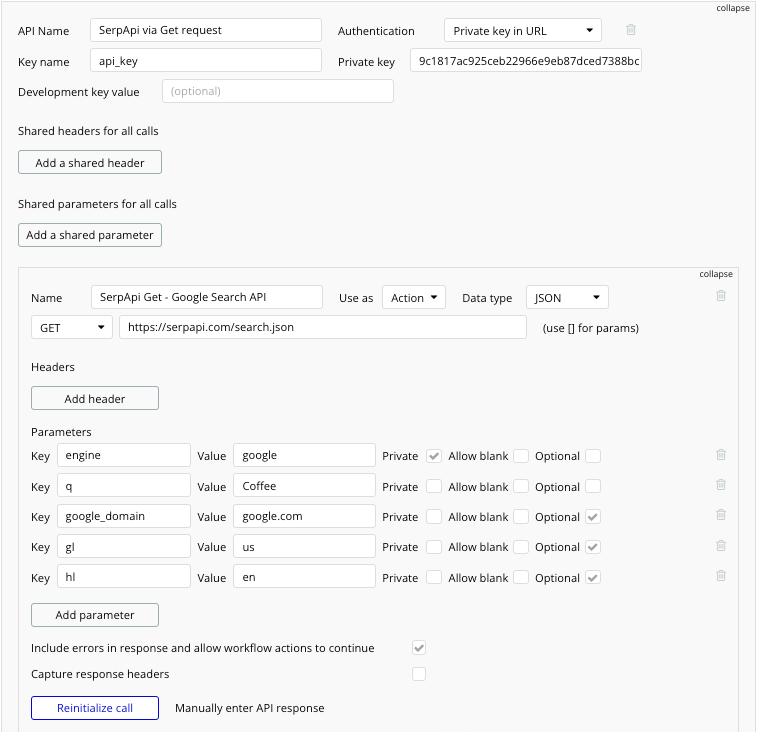
For specifying the parameters correctly, it is important to understand the meaning of the three options:
- Private: Check this box to mark the parameter as not editable within the app
- Allow Blank: Check this box to prevent a parameter default value used for initialization from being sent to the client or workflow inputs.
- Optional: Check this box to mark the parameter as not mandatory for this call, and can be specified if needed
Once all the parameters are set up, click on "Initialize Call"/"Reinitialize Call". Every call needs to be initialized before it can be used in your app. Initialization is done for two reasons:
- To confirm that the call was successful
- Bubble uses the response to recognize the data being returned by the server
After this, you are ready to use this API in your app!
Designing Workflows In Your Bubble.io App
Now that we have the API call set up, let's head over to the Bubble Design page (by clicking on the "Design" tab on the navigation bar on the left).
Here, we can start designing the app, adding the different screen elements and configuring workflows for when a button is clicked, or a field is populated by the user, etc.
Let's consider a simple example of accepting a topic from the user and displaying all the related questions from Google's page. For example, when we query "Schools in Austin", Google returns some related questions:
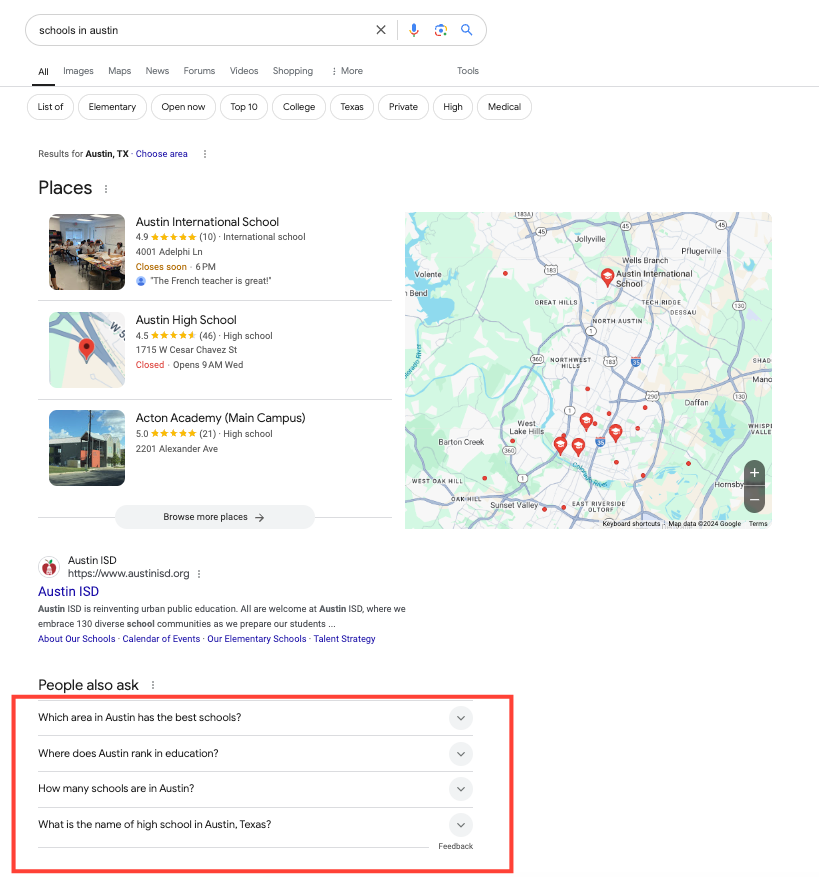
Let's create a simple page to display this data. We need one field to take an input from the user, a button that the user can click to get the questions, and one textbox to display the results. We can design a simple interface like this:
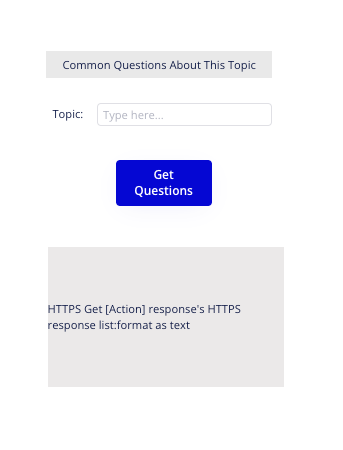
There are 2 parts we need to configure:
- What happens when the button is pressed?
- What is displayed in the text box?
When the button is pressed, we can configure a workflow by clicking on "Edit Workflow":
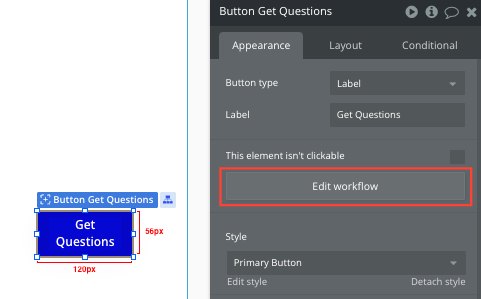
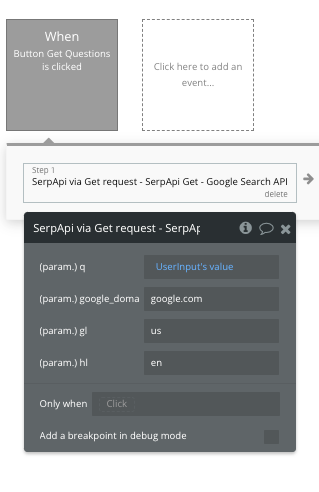
This will take us to the workflow editor. There, we will set up a workflow to send a request to the Google Search API we configured with the input from the user and the other parameters. This is what the step looks like:
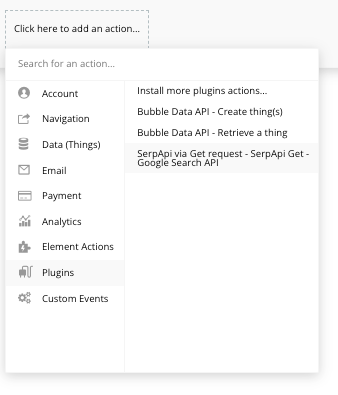
Add an action -> Plugins -> SerpApi's Google Search API (we configured this earlier)
Following this, we can configure the values for the parameters as applicable. Make sure q is set to the value of the user's input.
Now, let's add the next step to change the state of the result box and populate it with the resulting questions:
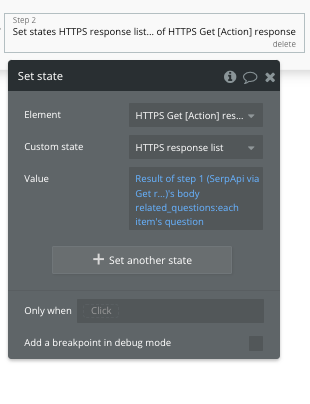
Here, it's important to understand how we got to the value formula. To understand this, we have to understand the structure of the response. So, let's head over to our playground to visualize the response:
There you can view the different elements of the response, and pick the parameters based on the data that you are interested in showing in your app. In the example above, I have chosen to display each question from the related_questions part of the API response. Once, you have an idea of what to pick, you can click on the "value" field in the Bubble state setting tool shown above, and select the relevant values. Here it is set to: "Result of Step 1 (API call)'s body's related_questions: each item's question".
Now, we are ready to configure the properties for the text box which will display the results. I have named this text box "resulting questions". Here is how this can be configured:
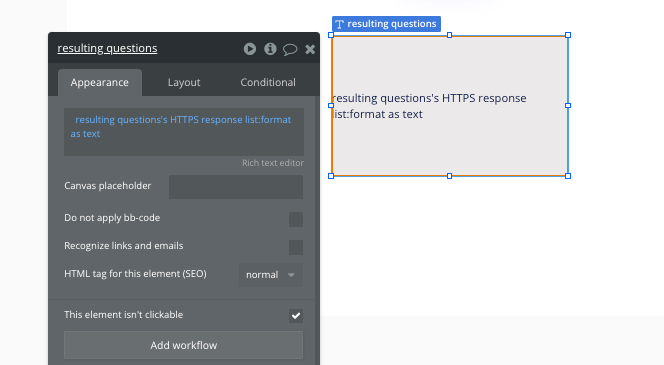
We can configure a couple things such as choosing which format we want to display the result in. I have decided to display the result as text.
Previewing and Testing Your App
Now that our UI is ready, the workflows have been configured and the API is set up and ready to use, we can preview the app and test it using Bubble's preview link on the top right:

Here are some queries to try out your app with:
- Schools in Austin
- Coffee
- Bread
Or, you can test it with any other queries which have the related_questions block shown in Google results.
Following this, you can deploy the app and view it in action!
related_questions block in the Google Search result. Optionally, to handle this case, you can add a conditional step in your button's workflow to check if no results are returned, and display a message like "No related questions found". Here is a demo of the example app we set up in this blog post:
Conclusion
Bubble.io offers a variety of powerful features designed to simplify web application development. Its visual editor allows users to create responsive designs that adapt to different screen sizes, while workflows enable the automation of complex tasks based on user interactions. Bubble also includes integrated database management, making it easy to organize and manipulate data directly within the platform. Through a vast library of plugins, you can extend your app's functionality by integrating third-party services like payment gateways, maps, and other APIs. I encourage you to check out their plugins here: https://bubble.io/plugins
We've covered how to create a web application in Bubble.io and scrape Google Search Results in your app using SerpApi.
I hope you found this tutorial helpful. If you have any questions, don't hesitate to reach out to me at sonika@serpapi.com.
Related Links and Posts
- SerpApi's Google Search Engine Results API
- SerpApi's Playground
- Bubble Apps Homepage [Login Required]
- Bubble's API connector plugin
Explore other ways to use SerpApi without writing any code:


