> ## Content Index
> Fetch the complete content index at: https://serpapi.com/blog/llms.txt
> Use this file to discover other available public pages before exploring further.
# Build an AI Voice assistant like Siri (use OpenAI AI Assistant)
- URL: https://serpapi.com/blog/build-ai-voice-assistant-like-siri-use-openai-ai-assistant/
- Published: 2024-04-26T02:48:26.000Z
- Updated: 2024-06-12T23:14:57.000Z
- Description: Learn how to build an AI Voice assistant like Siri, Alexa, etc. We will use OpenAI assistant as the main brain for the assistant.
- Author: Hilman Ramadhan
- Tags: Artificial Intelligence, openai
Hi! Today, we'll learn how to build an AI Voice assistant like Siri that can understand what we say and speak back to us.
## Demo AI Voice assistant
Here's what we're going to build:
This post will focus on implementing it as a web application. Therefore, we will use HTML for the interface and Javascript for the voice features. You might want to adjust this if you build for another platform (mobile, desktop, etc.).
*Regardless of the platform, knowing the components of how to build this will help us along the way.*

Tutorial to build an AI Voice assistant like Siri illustration
## Basic Voice AI assistant Structure
Just like other applications, we will have this basic structure:
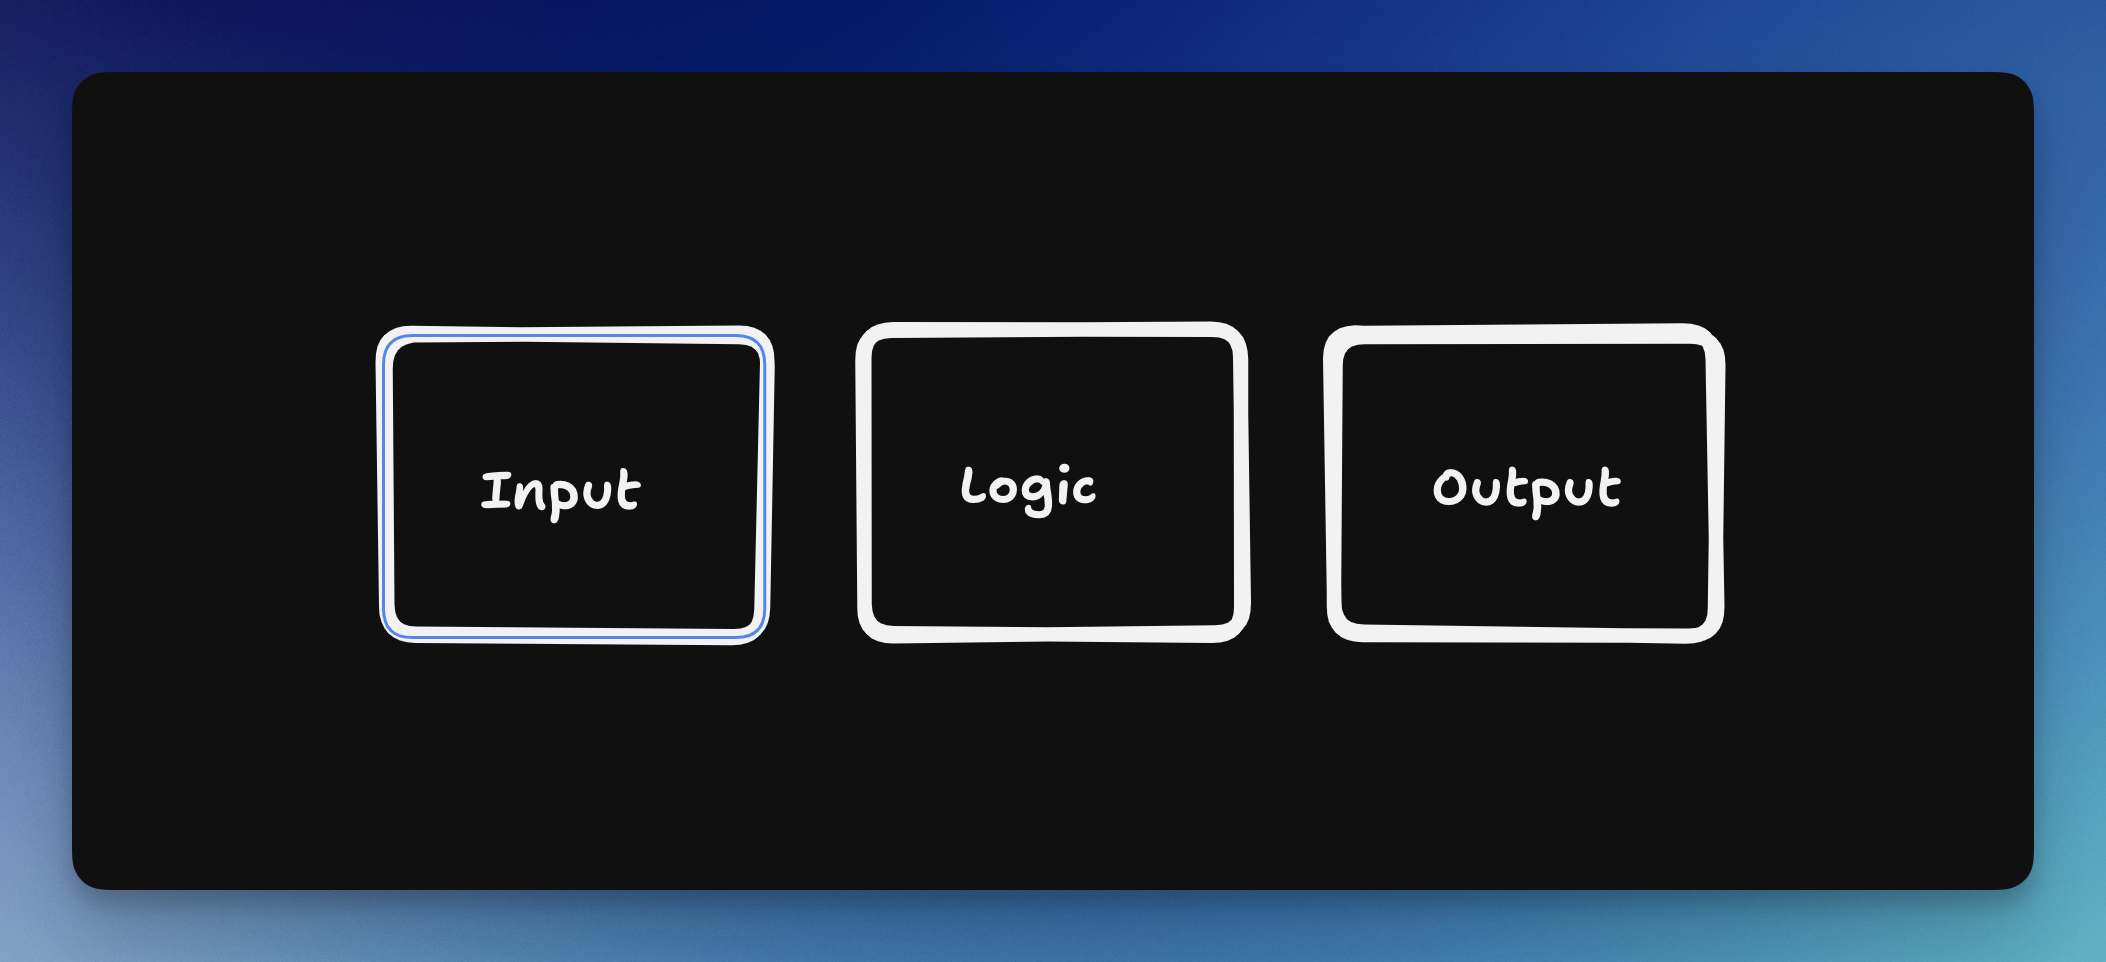
input, logic, and output illustration.
Here is what it looks like on our app:
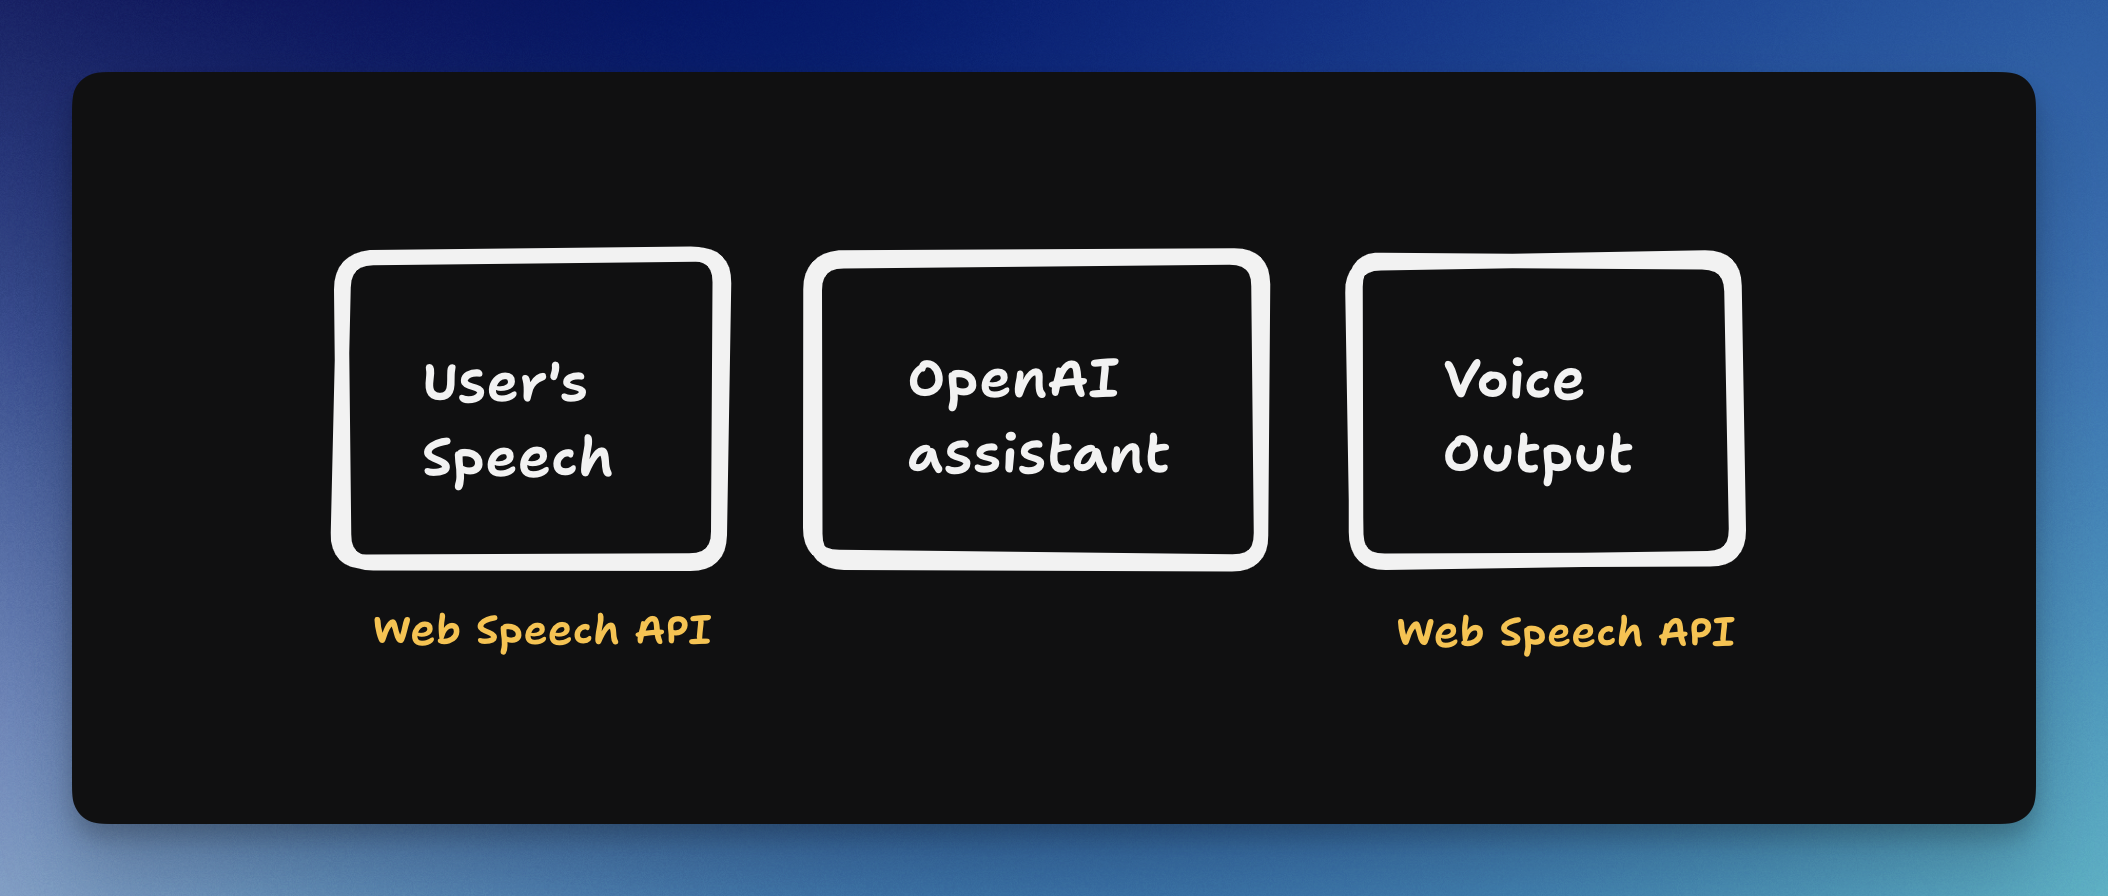
AI Voice assistant basic logic illustration.
You can replace each of these elements with the more advanced option. I'm trying to stick with what we already have in the browser. These are the alternatives:
- Voice input: AssemblyAI or OpenAI Whisper
- Voice output: Elevenlabs or OpenAI Whisper
## Code Tutorial on how to build a Voice AI assistant
We'll split our codebase into two parts, one for the front end and one for the back end.
> First, we just want to make sure that we can get a text from the user's voice and read a text out loud; there is no AI or conversation involved yet.
Here is the final code result of this post
[GitHub - hilmanski/simple-ai-voice-assistant-openai-demoContribute to hilmanski/simple-ai-voice-assistant-openai-demo development by creating an account on GitHub.GitHubhilmanski](https://github.com/hilmanski/simple-ai-voice-assistant-openai-demo)
Prefer to watch a video? Here's the video tutorial on Youtube
### Step 1: Basic frontend Views
Since we're building a web application, we'll use HTML.
\- We need two buttons to start and stop the recording
\- A div to display the text
```html
Output
```
(Optional) If you want to copy the style I implemented:
```css
```
### Step 2: Listen to speech
Let's trigger the actions from Javascript:
```javascript
```
### Step 3: Backend structure
We're using NodeJS/Express for the backend. Make sure to install the necessary packages in your new directory (separate from the frontend code):
```
npm init -y #initialize NPM package
npm i express cors dotenv openai --save
touch index.js #create a new empty file
```
```javascript
const express = require('express');
const cors = require('cors')
// Setup Express and allow CORS
const app = express();
app.use(express.json());
app.use(cors()) // allow CORS for all origins
// Main route
app.post('/message', async (req, res) => {
const { message } = req.body;
res.json({ message: 'Received: ' + message });
});
// Start the server
const PORT = process.env.PORT || 3000;
app.listen(PORT, () => {
console.log(`Server is running on port ${PORT}`);
});
```
Run `node js` in your terminal to run the server. Your application is running on localhost:3000.
We only have one route, which is `/message` , which receives a message from the client and echoes it back. This is to ensure that the input and output parts are running smoothly.
### Step 4: Send a message from frontend
Let's add a fetch method to send the message to that endpoint.
Update your `recognition.onresult` event to call the `sendMessage` function like this:
```javascript
recognition.onresult = async function(event) {
// Get the latest transcript
const lastItem = event.results[event.results.length - 1]
const transcript = lastItem[0].transcript;
document.getElementById('output').textContent = transcript;
await sendMessage(transcript); // New addition
}
```
Now, let's declare the `sendMessage` method:
```javascript
async function sendMessage(message) {
const response = await fetch('http://localhost:3000/message', {
method: 'POST',
headers: {
'Content-Type': 'application/json'
},
body: JSON.stringify({ message })
});
const data = await response.json();
console.log(data);
speak(data.message);
}
// SpeechSynthesis
let synthesis = null
if ('speechSynthesis' in window) {
synthesis = window.speechSynthesis;
} else {
console.log('Text-to-speech not supported.');
}
function speak(message) {
if (synthesis) {
const utterance = new SpeechSynthesisUtterance(message);
synthesis.speak(utterance);
}
}
```
I also added a new method called `speak` to use the Web Speech API, specifically `SpeechSynthesis` method to speak. The SendMessage will hit the endpoint we prepared previously.
### Step 5: Try the App
Now, run your HTML file, you can use something like VS Code Live server.
- press record
- say anything
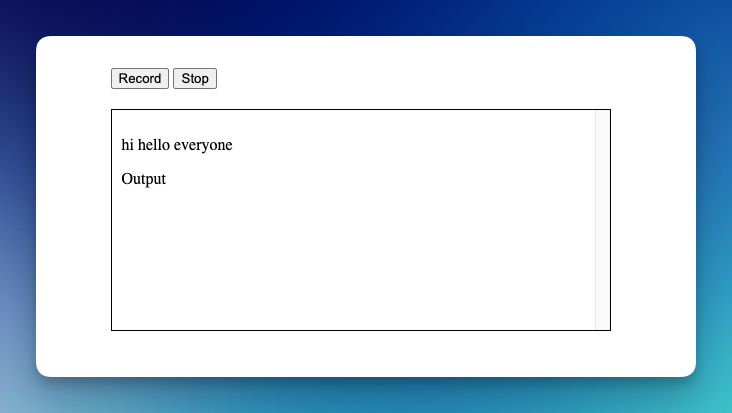
AI Voice assistant web application screenshot
Now, you should see your message echo back to you (it's coming from the server). Press the record button again to send a different message.
Now, we have an app that can listen and speak to us. Let's dive into the AI part!
## Smart AI assistant
We'll use the [OpenAI Assistants API](https://platform.openai.com/docs/assistants/overview) as the brain.
**Step 1: Install the OpenAI package**
We've previously installed the OpenAI package for NodeJS. Make sure you've installed it as well.
**Step 2: Grab your API Key**
Get your API Key from the OpenAI dashboard. Create a new `.env` file and paste it there.
```
OPENAI_API_KEY=YOUR_API_KEY_FROM_OPENAI
```
**Step 3: Import OpenAI and dotenv**
```javascript
require("dotenv").config();
const OpenAI = require('openai');
const { OPENAI_API_KEY } = process.env;
// Set up OpenAI Client
const openai = new OpenAI({
apiKey: OPENAI_API_KEY,
});
```
**Step 4: Implement assistants API**
If you're not familiar with the assistants API, I suggest to read this introduction blog post first:
[Assistant API by OpenAI (Basic Tutorial)Learn the basics of Assistant API by OpenAI. We’ll create a super simple coding example to understand the barebone of Assistant APISerpApiHilman Ramadhan](https://serpapi.com/blog/assistant-api-openai-beginner-tutorial/)
We'll use the same logic and code for this tutorial (with some updates soon). You can also get the code sample for the API assistants here:
[GitHub - hilmanski/assistant-API-openai-nodejs-sample: A simple example for Assistant API by OpenAI using NodeJSA simple example for Assistant API by OpenAI using NodeJS - hilmanski/assistant-API-openai-nodejs-sampleGitHubhilmanski](https://github.com/hilmanski/assistant-API-openai-nodejs-sample)
> Note: I won't explain and show the whole code here.
**Step 5: Add the assistants API**
We need to tell the AI assistants that they will act as general helpers who can help us with anything.
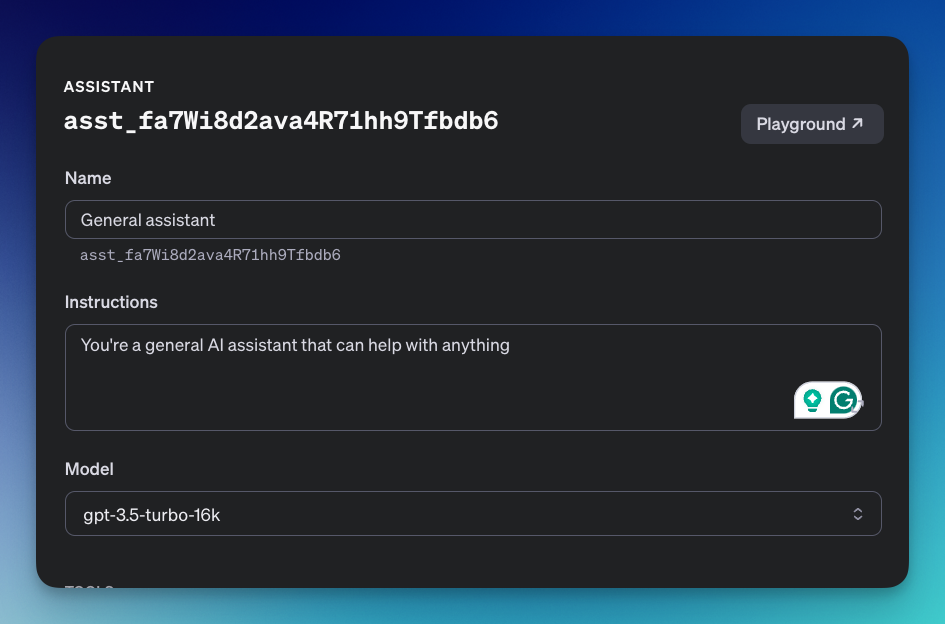
Create the AI assistant via OpenAI dashboard
*\*Make sure to update the assistant\_id key on your code.*
**Step 6: Assign a thread ID**
Since the API needs a thread unique ID for each conversation, I'll add a new fetch request on our frontend to automatically ask for a thread id on the first visit. The ID will also updated on browser refresh.
*Reminder: we have this route to create a thread ID from the OpenAI assistant tutorial*
```javascript
// Open a new thread
app.get('/thread', (req, res) => {
createThread().then(thread => {
res.json({ threadId: thread.id });
});
})
```
Let's add this block to our HTML file (frontend part)
```javascript
let threadId = null;
// onload
window.onload = function() {
fetch('http://localhost:3000/thread')
.then(response => response.json())
.then(data => {
console.log(data);
threadId = data.threadId;
});
}
```
We'll adjust our `sendMessage` method to attach the `threadId` when sending a message.
```javascript
async function sendMessage(message) {
const response = await fetch('http://localhost:3000/message', {
method: 'POST',
headers: {
'Content-Type': 'application/json'
},
body: JSON.stringify({ message, threadId }) // <- update here
});
// continue
```
**Step 7: Return the last message only**
Let's update our `checkingStatus` method to only return the latest message from the AI
```javascript
async function checkingStatus(res, threadId, runId) {
const runObject = await openai.beta.threads.runs.retrieve(
threadId,
runId
);
const status = runObject.status;
console.log(runObject)
console.log('Current status: ' + status);
if(status == 'completed') {
clearInterval(pollingInterval);
const messagesList = await openai.beta.threads.messages.list(threadId);
const lastMessage = messagesList.body.data[0].content[0].text.value
res.json({ message: lastMessage });
}
}
```
Our voice assistant is ready!
**Step 8: Show all messages**
If you want to add all previous transcriptions to the user interface, here is the code to collect all the previous messages in the div.
First, every time we speak:
```javascript
recognition.onresult = async function(event) {
// Get the latest transcript
const lastItem = event.results[event.results.length - 1]
const transcript = lastItem[0].transcript;
// Update: Append new text to div
const newText = "
" + transcript + "
";
document.getElementById('output').insertAdjacentHTML("afterbegin", newText);
recognition.stop();
await sendMessage(transcript);
}
```
Second, every time we got a response from the AI:
```javascript
async function sendMessage(message) {
console.log('Sending message: ', threadId);
const response = await fetch('http://localhost:3000/message', {
method: 'POST',
headers: {
'Content-Type': 'application/json'
},
body: JSON.stringify({ message, threadId })
});
const data = await response.json();
// update: add new text here
const newText = "
" + data.message + "
";
document.getElementById('output').insertAdjacentHTML("afterbegin", newText);
speak(data.message);
}
```
> Make sure to re-run your NodeJS app. Now try to have a chat with your AI!
## Things we can improve
There are several things we can improve for this voice assistant
**AI Instruction**
Since we're building a voice assistant, it shouldn't explain things too long for a simple question. We can adjust the instructions like this:
```
You're a general AI assistant that can help with anything. You're a voice assistant, so don't speak too much, make it clear and concise.
```
**Voice and listening**
We use native browser API to listen and speak. Better alternatives exist, such as Elevenlabs, AssemblyAI, and more.
**Knowledge Limitation**
We're using one of the OpenAI models, where the knowledge is cut off at a particular year. We can expand its knowledge by providing PDF files or [connecting the assistant API to the internet.](https://serpapi.com/blog/connect-assistant-api-to-the-internet-openai-x-google/)
\[Update\]
A new blog post on [how to connect real-time data to your voice assistant](https://serpapi.com/blog/build-a-smart-ai-voice-assistant-connect-to-the-internet/).
**Speed**
Using the OpenAI API assistants, it took some time to return the response from the AI model. One way we can improve this is by using Groq, which is a company that provide a service to run super fast AI engine. (Not all AI models available).
Here is [how I build a very fast AI assistant using Groq](https://serpapi.com/blog/create-super-fast-ai-assistant-with-groq/). Feel free to read.